
Showing posts with label Yumm. Show all posts
Showing posts with label Yumm. Show all posts
Thursday, January 3, 2013
Recipe Update
Hey-o I recently updated one of my favorite recipes, the instructions are much easier to follow so now you have no excuse not to make it. Behold the Double Chocolate Torte.
Sunday, April 29, 2012
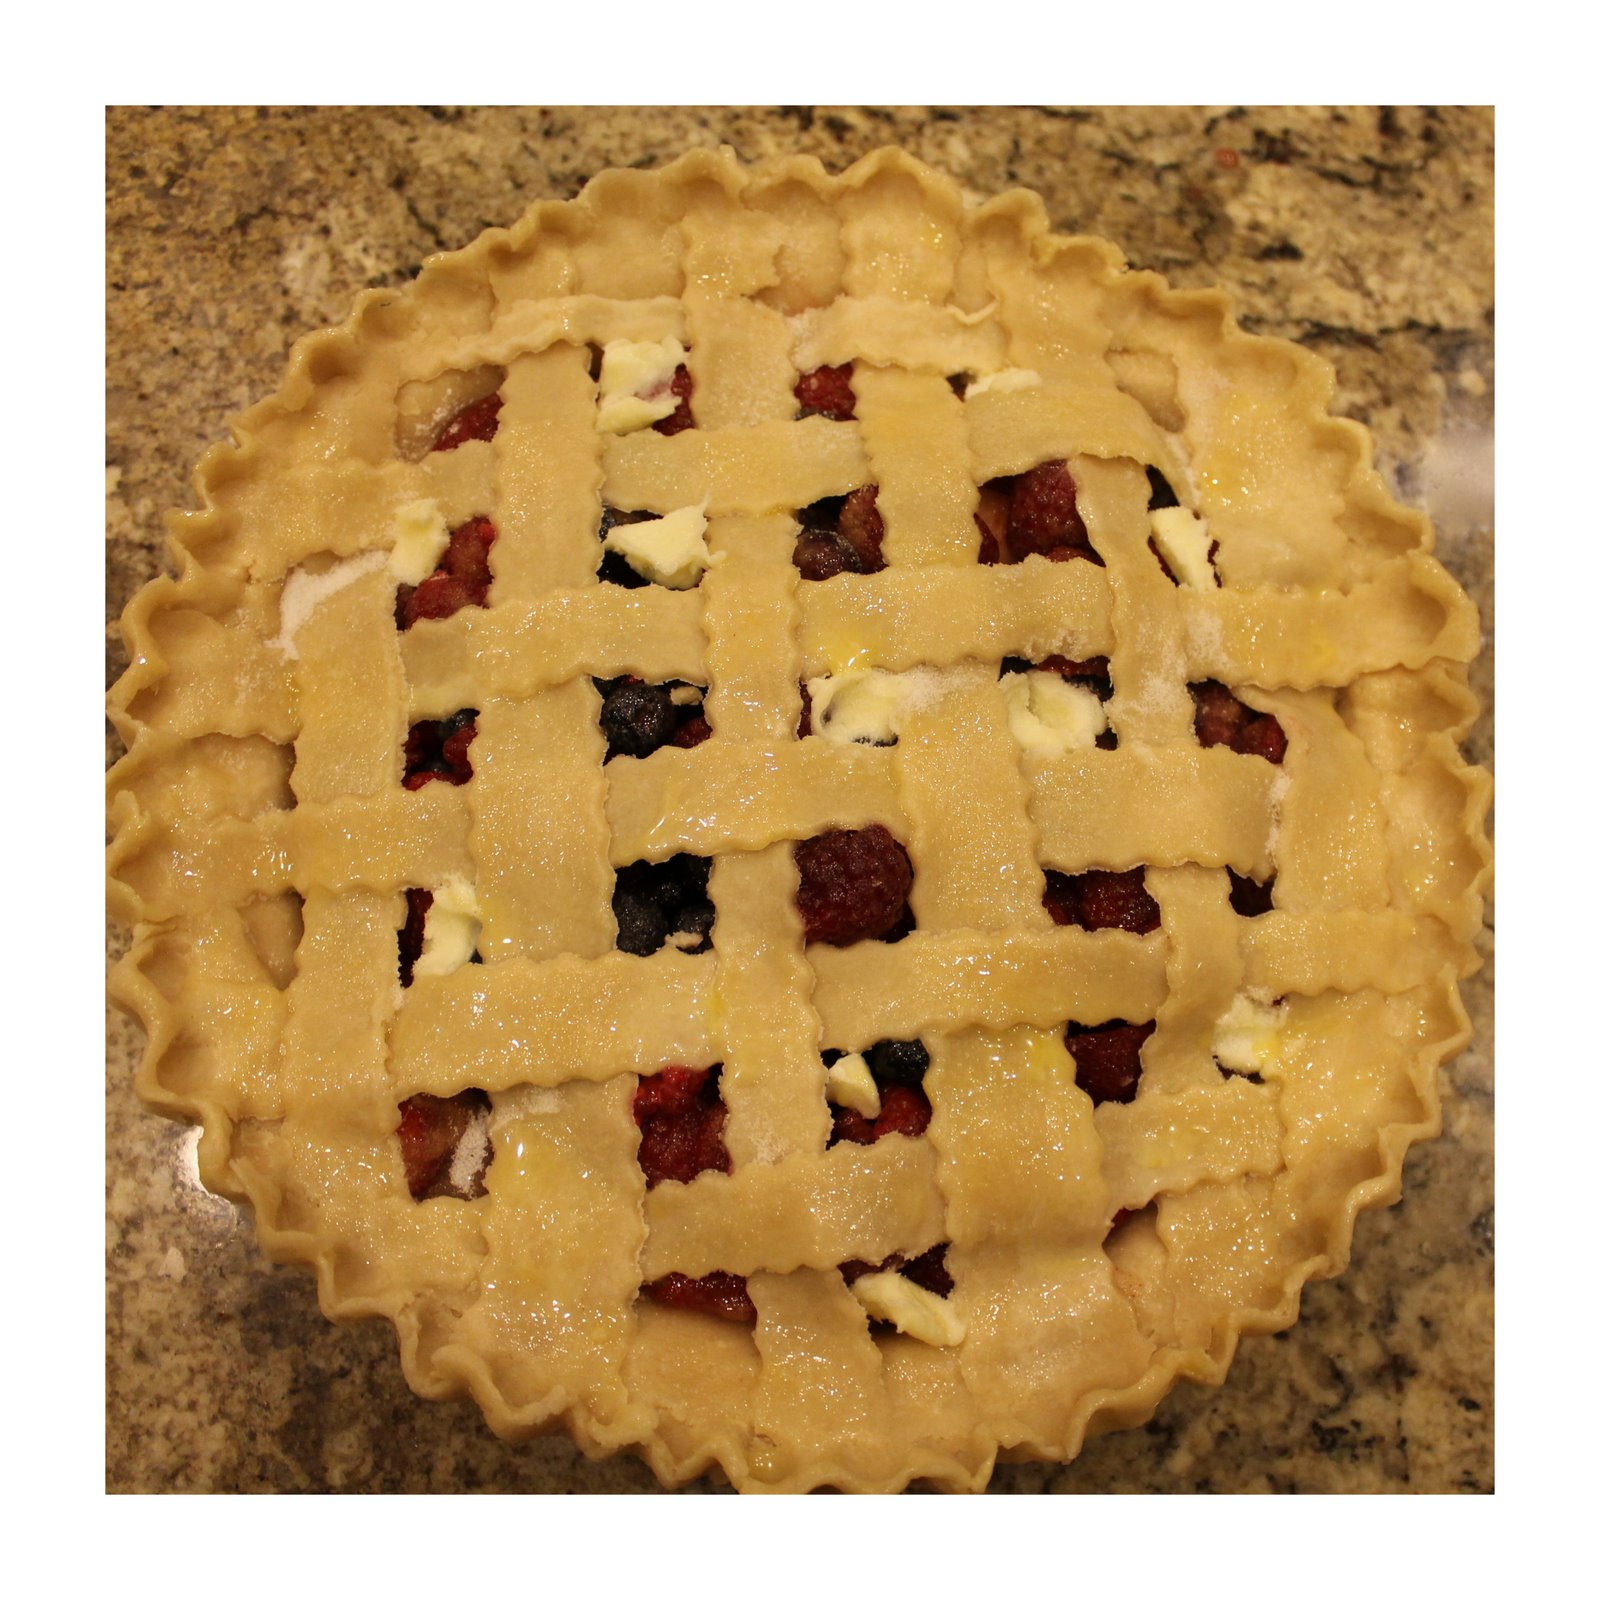
Razzleberry Pie

I have fond memories of razzleberry pie.
It's the first pie I ever made by myself (at age 10). My mother supervised, it turned out great. I remember coming home from school the next day and picking at the crust, nibbling on the crumbs, certain that no one would ever know. The fruit and the salty
crust make for a fantastic combination. A little splash of lemon juice
and a dash of cinnamon add a depth of flavor that simple sugar can't attain. Those flavors really make the berries pop. It's
just...good. Real good. And for reasons I can't figure out I haven't made
this pie since my first attempt so many years ago. Yesterday I decided that it was high time for some pie! Mom by my side, we again
conquered the razzleberry pie.
*Before making filling, make 1 recipe of pie dough for a double crust 9'' pie. When dough comes together separate into two equal balls and set aside. Cover with a clean, wet kitchen towel to keep from drying out.

Ingredients:
1 cup fresh strawberries, halved
2 cups raspberries
1 1/2 cups fresh blueberries
2/3 cup white sugar (Plus 1 t. for sprinkling)
1 tespooon cinnamon
1/4 cup cornstarch (Plus 1/2 t. for sprinkling)
1 teaspoon lemon juice
1 Tablespoon butter
1 egg
1 Tablespoon water
1 recipe for a 9 inch double crust pie
In a large bowl combine all berries. Mix sugar, cinnamon, and cornstarch in small bowl till completely incorporated. Sprinkle mixture over berries and toss gently to cover. Allow berries to macerate, soften and release their juices. Add lemon juice to berries. Set aside.
Step 2: Bottom Crust

While the berries are resting roll out bottom crust piece to fit in a 9'' pie plate. Press dough in plate and sprinkle with 1/2 t. cornstarch and 1 t. sugar
to keep bottom crust from getting soggy. Pour berries and all juices
into prepared pie plate. Cut tablespoon of butter in to smaller pieces
and sprinkle over the top of the berries.
Step 3: Top Crust

Roll out top crust, make vents and place on top of pie. Or cut strips
and make a lattice crust by weaving each strip of dough over and under
other strips. Pinch edges and create desired pattern. Whisk together
egg, and water using a pastry brush or fingers brush on top crust, to
help with browning. Sprinkle crust with sugar, if desired.
Step 4: Bake
Bake in 375
degree oven for 20 minutes until top is brown. Cover edges with pieces
of foil and continue baking 30-40 more minutes until berries are
bubbling and crust is brown. Remove from oven and allow to cool on a cooling rack for at least 3 hours.
Step 5: Eat

Serve with whipped cream, ice cream, no cream. However you please. You'll enjoy it, I'm sure!
Thursday, February 2, 2012
Birthday
Yesterday I turned 23 and I decided
until I turn 25 the number really doesn't matter anymore. And even then,
when I do turn 25 will the number feel any different? I say, probably
not. Regardless of the number and whether or not it matters I had a
really great February 1st birthday. I've realized birthdays are becoming
less about me and more about the people I love. Good friends, a loving
family, a great husband, all went in to making yesterday an
overwhelmingly good day. It's so nice to feel loved. Thank you all for
your kind words and birthday wishes. Whether it was on Facebook or over
the phone or otherwise. Thank you.
February 1st 2012:

In
the morning Adam woke up up with a "Barlow Bed and Breakfast" menu and
then proceeded to make me breakfast in bed. I loved the 6th option on
the menu "More bed less breakfast". After breakfast in bed I headed to
work where I went on a long walk with my little buddy. We walked past
the national cathedral so that I could ooh and ahh over it for the
billionth time. After work I got a manicure and pedicure at the Four
Season's Hotel thanks to my wonderful boss.

When Adam got home he took me to Founding Farmers a
restaurant down the street from our apartment. And holy crap. All those
yelp reviews...they're not kidding, the food was fantastic. The
restaurant was super busy, but the ambiance was so cozy and welcoming.
It was the perfect place to spend a birthday.

We
started off our meal with the "Popcorn of the Day" which happened to be
spicy BBQ flavor. You can sort of see it in the bottom right picture.
It was super good and so fresh it was still warm from being popped. We
also tried the much buzzed about ginger ale. It's made in house with
fresh ginger and finished with a cucumber. It was really good, and so
refreshing. The restaurant was started by a whole bunch of local
farmers. They're really into fresh farm to table type food preparation.
And after tasting the food it's obvious that that makes a difference.
The food is not processed and is fresh out of the ground, local meats,
veggies and fruits. I loved it. I really can't wait to go back. I got
the lemon rotisserie chicken and Adam got the shaved pork sandwich. If
you're ever in DC you must, must visit this restaurant. It's so worth
it. You'll thank me.

That's
me with the most delicious apple concoction to grace the planet. It's
called an apple pie but its more like an apple pouch. Diced apple and
caramel and cinnamon and butter are all chillin inside this dough pouch
thing sprinkled with sea salt. It's served with vanilla ice cream and
caramel and ohmygosh, holymolycanoli it was fabulous. So simple, yet so
delicious. They even got festive and gave me a candle to blow out! We
loved it.

After
dinner we headed back to our apartment so that I could FINALLY open the
birthday box my family sent me. We skyped and it was so nice to be able
to see family. I didn't realized how much I missed home until I saw it. My mom was so sweet and got me the most adorable yellow dress ever,
along with many other awesome gifts. I got super spoiled! She's so good
at making birthday's special.
Yay for birthdays
Monday, January 30, 2012
Eastern Market
I'm not sure that there is a more perfect place to be on a warm weekend morning than at the Eastern Market. It's an outdoor/indoor market that takes place here in DC. Vendors set up their booths and sell all types of things from produce to artwork, to vintage clothes to mini doughnuts. I saw more types of apple than I ever even knew existed.We sampled a local orchard's apple cider and I cried a little. It was so good. Maybe I'm sipping some right now as I type. Maybe I had a mug full at at midnight last night. Mmmm apple cider.

I think maybe in another life I was a cheese artisan. I have a strange obsession with cheese. On our first date Adam took me to the grocery store to get soft serve ice cream from the deli counter. The specialty cheese section was right next to the deli. I still wonder what Adam thought of me when on our first date I confessed my love for cheese. "My favorite isle in the grocery store is the special cheese isle, it makes me really happy." Who has a favorite isle in the grocery store? Why is the cheese special? And why does it make her happy? I'm sure those were just the first of many questions he had about me and my love for cheese. Anyway that was a really long way of explaining to you my delight when I came upon a cheese only booth. All types of cheese. Everywhere. Again I cried a little. Can we talk about the Smoked Gouda?

After my moment with cheese. We came across Migue's Magnificent Mini Doughnuts. Mini doughnuts freshly made in front of your face. It's like heaven. Deep fried. All I have to say is that I cried. A lot this time. I reeeeeeallly love doughnuts. So what I'm a fat kid. That little doughnut maker invention that Migue's has it's hands on rocks my world. The dough is dropped into hot oil by this funnel thing and then is cooked while being pushed along by these spatula things and the is taken up a conveyer belt where the excess grease can drip off and then is dumped into a bowl. Can I just say that my birthday is this week and this is me officially asking for this contraption as a gift. Please Adam! Please!

Next to the doughnuts was a crepe stand. Crepes are always a good idea. I had read several articles about the crepes at Eastern Market and was really looking forward to giving them a try. They definitely didn't disappoint. We got the classic strawberry, banana, nutella crepe. I'm still dreaming about it.

Have you ever tried Yoohoo? If you haven't don't. Its like chocolate water. And it's disgusting. Sick. This guy loves the stuff. We took the following array of photos after he discovered the $1.00 per can cooler next to the crepe stand. I guess we all have our vices.

Before we left we walked through the flea market that was next door. It made me wish I had a home to decorate. So many grand things to buy. Can we be done being students yet? Nope, never.

It was a glorious morning. I have a feeling we will be frequent visitors to the Eastern Market while we're here in the District of Columbia.
Sunday, January 22, 2012
Pasta Salad
Because Adam goes into an office everyday and can't come home for
lunch I have needed to get more creative in home lunch ideas. A turkey
sandwich everyday gets "old" as Adam says. So I headed over to trader
joe's last week and picked up some foccacia bread and a few ingredients
to make a pasta salad. It's the perfect solution, the salad can go as a
side to half a sandwich or paired with a chunk of bread can be a
complete meal. We decided that the salad was such a hit that once a week
I'll get a few different ingredients and will make a pasta salad for
homemade lunches. That's my favorite thing about pasta salads they are
so versatile they can be as complex or a simple as you like. You prefer mozzarella cheese: use it, don't like olives: hold em, you get the idea.
This recipe is for a Mediterranean style pasta salad. Try it out It
keeps really well and like I said customize it to your liking!

Mediterranean Pasta Salad:
1lb tri color pasta, boiled till al dente in salted water
1 can olives, black or kalamata
1/2 cup sun dried tomatoes, I used the kind packed oil in a jar
1/4 cup red onion, diced
8 oz feta cheese
1/2 cup Parmesan cheese
A few handfuls of spinach (as much as you prefer)
1/2 tsp salt
1/2 tsp pepper
1/2 tsp oregano, dried
1/2 -3/4 cup Balsamic Vinaigrette salad dressing
Saute spice (1/2 tsp salt, 1/2 tsp pepper, 1/2 tsp garlic powder)
After pasta has cooked for 7-9 minutes drain in colander and pour
pasta into a large bowl, toss with a couple of tablespoons of salad
dressing to keep pasta from sticking as it cools. Allow pasta to cool
completely to room temperature. When pasta reaches room temperature,
toss in olives, tomatoes, onion, cheeses and spinach, mix thoroughly.
Mix salt, pepper and oregano with salad dressing in small bowl and pour
over pasta, toss (or cover with lid and shake). Finish with saute spice
and toss again. Cover bowl with lid and place in refrigerator till ready
to use, it's best if it sits over night.
Monday, January 16, 2012
Martin Luther King Day
In honor of MLK we attended a celebration at the Washington DC National Cathedral. Various gospel choirs from around the area coordinated and made the event a success. My favorite part was when the singers preformed the song "Seasons of Love" from the musical RENT. The congregation joined in and the soloists were top notch. It was a great experience.

After the "King in Our Midst" celebration we chowed down on some pizza at the Pi.We opted for a classic deep dish style pizza. I found it awesome that thin crust pizza and deep dish could exist harmoniously on the same menu. Cheesy, delicious pizza always a good idea. (We both agreed though that it was no where near as good as Papa Del's...ooh Papa Del's we love you.)

Last on the agenda for this Monday holiday was some dessert. Some serious dessert. The deep fried Oreo sundae at Serendipity 3 in Georgetown. Gluttons. That's all we had to say for ourselves after we finished that dessert. It was intense. Mr. King would have been impressed, we know Mr. Lincoln was.

Over all it was a great day, and although we did make resolutions to be a bit more healthy this year, we'll just call those deep fried Oreos a hiccup. Besides, we went to the gym this morning. So that's good right? Don't answer that.
We hope your Martin Luther King day was relaxing and great.
Monday, December 19, 2011
Chicken Pot Pie

I could probably eat these chicken pot pies daily. But I won't because they are sort of a lot of work and because after a month of eating nothing but pot pies I would probably not be able to walk out my front door. That being said this is a once and a while meal at our house, but I really look forward to when that once and a while finally rolls around again. It was mom's birthday this weekend and she asked for these as her birthday meal. Anything for momma. Here's the recipe, and directions.
Step 1: Crust

Make your favorite pie crust. The filling makes enough for one 9'' pie or four 4'' pies so you'll need enough dough for the bottom and top crust of the size or sizes you choose. Once your pie dough has come together press it into the pans (or pan) you choose. Prick the sides and bottom of the crust with a fork, so that when it is baking it doesn’t bubble up. Place on a cookie sheet and bake for 5-7 minutes until it's semi done. It may still look glossy in some places. It's important to bake the crust, even for just a little bit so that when the filling goes in the crust will be cooked through. Roll top crust in to 4 small balls (or one big ball ) and cover with a damp kitchen rag so that it doesn’t dry out, and set aside until the bottom crusts are filled.
Step 2: Filling

Ingredients:
1 lb chicken, cubed and cooked
6 red potatoes, cubed and cooked
1 c. carrots, cubed 1/2 c. celery, cubed
1 c. frozen peas
1/2 onion, chopped
1/2 c. butter
1/2 c. flour
1/2 t. salt
1/4 t. pepper
1/4 t. celery seed
1/2 t. garlic powder
1/2 t. poultry seasoning
1/4 t. basil
2 c. chicken broth
2/3 c. milk
In a pot of boiling water cook carrots and celery for 5-7 minutes until tender crisp. Remove from heat and drain, set aside. Preheat oven to 425 degrees. In a large pot sauté onions in butter until translucent, about 4 minutes. Mix flour and spices in bowl and add to butter and onions. Stir and allow flour to absorb all butter, the mixture will be crumbly. While continuously stirring (or whisking) add chicken broth to flour mixture. Bring to a boil and allow to thicken, 3 - 5 minutes. Add milk, chopped veggies, frozen peas, chicken and potatoes, stir to fully incorporate. Allow mixture to warm through and continue to thicken over medium low heat for 10 minutes, stirring.
Once mixture is thick, remove the pot from stove and fill each pre-cooked pie crust till heaping. add top crust and seal edge. Using a fork prick top creating a vent hole for steam to escape. Prick edges of top crust finishing the seal.
If desired make and egg wash by mixing one egg with a tablespoon of water and brush on top crust before baking. This will make the pies golden brown and really pretty :)!
Bake pies (or pie) on a cookie sheet for 20-25 minutes for the 4'' pies or 30-35 minutes for 9'' pie. Bake until the crust is golden.
Sunday, November 27, 2011
Food Adventure: Kansas
When I met Adam he told me that his favorite type of food was BBQ.
At the time I found that strange. Probably because the only experience I
had ever had with "Bar-B-Que" was Famous Dave's. After getting engaged
Adam introduced me to a little place called Oklahoma Joe's, in Kansas.
There, I found the light. I was shown the way, and I was converted.
Oklahoma Joe's Bar-B-Que is the best Bar-B-Que I have ever tasted in my life.
The owners could run a thriving business based on their french fries alone.
They are that
good.We went on "burnt end" night which, by the look of the line is
favorite among locals. In case you were wondering burnt ends are
flavorful pieces of meat cut from smoked brisket. According to Wikipedia
they are a traditional part of Kansas City Bar B Que. Burnt ends are considered a delicacy in Bar B Que
cooking. Kansas state food is wet bar b que. Basically the difference
between wet bar b que and the dry bar b que of North Carolina is how
it's served. Kansas style bar b que is all about the sauce, it's messy
and saucey and is served with many napkins. North Carolina bar b que is
much more about the meat, little to no sauce is used.
We got the burnt ends and the bar b que chicken sandwich. Thanks for the always amazing bar b que Oklahoma Joes!


On our "yumm scale" we rated Oklahoma Joe's Wet BBQ as a Holymolycanoliyumm!
For your reference the "Yumm Scale" :
1. Yuck
2. Yu...
3. Yumm
4. Super Yumm
5. Holymolycanoliyumm!
For your reference the "Yumm Scale" :
1. Yuck
2. Yu...
3. Yumm
4. Super Yumm
5. Holymolycanoliyumm!
Saturday, October 22, 2011


Thursday, October 13, 2011
Pumpkin Chocolate Chip Bread
There are few things in this world that I love more than pumpkin chocolate chip bread, in fact I could probably count them on one hand. I love it. This recipe is the best I've found, it's super moist and the top gets a little crunchy which is awesome. It's a perfect fall treat, try it out you're going to love it!

Pumpkin Chocolate Chip Bread
Ingredients:
3 ½ cups white flour
3 cups sugar
2 teaspoons baking soda
2 teaspoons ground cinnamon
1 teaspoon ground nutmeg
1 teaspoon salt
1 (15 oz.) can pumpkin puree
1 cup vegetable oil
4 large eggs
2/3 cup water
1 cup semi-sweet chocolate chips
Preheat oven to 350 degrees. Grease two 9×5-inch loaf pans or four 6x3-inch loaf pans. In a large bowl, mix flours, sugar, baking soda, cinnamon, nutmeg and salt together. Set aside. In a medium bowl, whisk together canned pumpkin, oil, eggs and 2/3 cup water until well combined and stir into dry ingredients, just until the dry ingredients are moistened and no dry streaks remain. Stir in chocolate chips. Pour batter in prepared pans.
Bake the bread for 60 to 70 minutes for large loaf and 30 to 40 minutes for mini loaves, or until a toothpick inserted in the center comes out clean. Remove the bread from the oven and let sit for 10-15 minutes. Run a knife gently around the edge of the bread and turn the bread out, right side up, onto a wire rack to cool completely.
Wednesday, October 5, 2011
Fall Bucket List
 Isn't fall such an awesome time of year? The colors, the wardrobe, the yummy food? I totally dig it. Unfortunately it seems like it always ends so quickly and I am never able to do all of the fun things that fall has to offer. So this year my friend showed me this cute idea she found for a fall bucket list. It has inspired me to get organized, I have made my own fall bucket list full of activities I want to do this season.
 You should make one too, and then we'll all have an awesome fall!
Wednesday, September 14, 2011
Classic Italian Manicotti

This recipe is in my top ten go to recipes for nearly any occasion, hectic weeknight, impressive Sunday dinner, freezable meal, the yum factor is totally there, it's real simple, and every time I make it I wonder why I don't make it more often. What's not to love its 3 kinds of cheese, pasta, fresh herbs and tomato sauce, this stuff is the real deal.
Make it ok? Then let me know what you think.
Classic Italian Manicotti
Ingredients:
4c. (about 15oz) Ricotta cheese
2 1/2c. Shredded Mozzarella (1/2 cup reserved for topping)
3/4c. Parmesan Cheese (1/4 cup reserved for topping)
2 eggs
1/4c. chopped fresh parsley
1/2t. pepper
1/2t. salt
One box of manicotti tubes or jumbo shells
1 jar marinara sauce (store bought is fine or get a little crazy and make it at home!)
Preheat oven to 350 degrees. Boil a large pot of salted water cook pasta for 7-10 minutes until al dente, drain pasta and set aside. While pasta is boiling mix all cheeses, eggs, parsley, pepper and salt, leaving out the reserved Parmesan and mozzarella to top the manicotti. Pour 1/2 the jar of sauce in 9x13 baking dish. One by one fill each manicotti shell (or tube) with the cheese filling, placing each as you go in the prepared pan. Once all shells are filled pour remaining sauce on top and sprinkle the reserved cheeses. Cover dish with tinfoil and bake covered 20 minutes, remove foil and bake 15 more uncovered, until cheese is melty and delicious.
Thursday, August 25, 2011
Zucchini
So I saw a book yesterday that was entitled "101 things to do with Zucchini", my only thought was - why would you want to do anything with zucchini other than make it into scrumptious, cinnamony, delicious zucchini bread? Whhhyyy?


Wednesday, August 10, 2011
Shredded Chicken Taco Salads

Picture this: 9 hour work day, less than 5 hours of sleep, grouchy husband, grouchy wife, bad hair day all come together for one culminating event: Dinner time. Before being enlightened I would say it's a subway night, but now I have the perfect solution. We're talking about 4 ingredients. 4. You can handle that right? Right. Two words for you: CROCK POT. Two more: Taco Salad. Are you with me? I am going to make this so easy for you. Here's the recipe that will change your life:

Ingredients:
4 chicken breasts
2 cups chunky salsa
2 cups frozen corn
1 can black beans, rinsed and drained
Dump all ingredients in a crock pot. Cook on high for 5 hours, in the last 30minutes shred the chicken and allow to soak up more juice. Serve over tortilla chips, with lettuce, cheese, limes, cilantro, etc...
So flippin simple huh?
Tuesday, August 9, 2011
Summer Lovin

august is...
red striped bows, and puppies
twinkle lights on warm nights, crusty fresh bread
and fresh tomatoes from friends, new school books,
and coconut macadamia nut cookies
i.heart.august.
Wednesday, August 3, 2011
Him
you are the cheese to my macaroni
you are the horizon to my sky
you are the bacon to my eggs
you are the laces to my sneakers
you are the jelly to my peanut butter
you are the smile to my face
you are the gravy to my mashed potatoes
you are the bubbles to my bath
you are the milk to my cookie
you are the ink to my pen
you are the ketchup to my french fries
you are the water to my ocean
you are the icing on my cupcake

this is the first picture I ever saw of Adam. I was sold. Immediately.
Can I just gush for a minute?
I'm just super grateful for him.
And I think he's pretty neat.
Sunday, July 24, 2011
Weekend Away
 These are some of the shining moments from our cabin weekend. Isn't it amazing how beautiful the simplest things can look through the lens of an iPhone? I'm still wondering how it's possible I've lived so long with out one. Anyway that's a different post. This weekend my aunt and now uncle were married at my grandparents cabin in bear lake. It was a blast to spend time with family and see people that I don't normally get to. We built fires, and had long talks with new cousins, we ate grandpas famous cabin breakfast, and made ourselves sick eating too many bear lake raspberries. We visited LaBeaus and went shopping, and spent too much time laughing. Overall it was certainly a weekend not to be forgotten - this is what summer is all about, I'm so grateful for family, and good friends.
Wednesday, July 20, 2011
Simple Cheesecake

How do you feel about cheesecake? Do you love it? Have you ever tried to make it? I have a small confession, I go through these food fear phases. Where I'm terrified to cook with a certain ingredient or make a certain dish. First it was yeast, then cheesecake, it's currently pie crust that I'm trying to avoid, but that's for another time. At some point the inevitable happens and I must face my fear. I've conquered yeast, and now cheesecake too. I was always so nervous that the temperamental custard filling would crack or dry out or become leathery on the outside and be undercooked on the inside. (Yuck, yuck, yuck!) But this easy recipe changed everything. It made putting a cheesecake together so simple! There's not many ingredients, but the flavor and texture are exactly what I want in a cheesecake. Smooth and dense and delicious. Seriously, if you're a cheesecake fan (let's be honest who isn't) you've got to try this! The most important thing you must keep in mind when making cheesecake is not to over beat the batter. Over beating causes too much air to be whipped into the batter, thus causing cracks. (No bueno, ya hear?) The key is to only beat until the ingredients are BARELY incorporated. You really should feel as if you're under beating. If you keep that little tid bit in mind you'll breeze through this recipe like a champ.
Simple Cheesecake
Ingredients:
Crust:
1/2 cup butter, melted
2 1/2 cups finely ground Graham crackers, about 35 squares (Pulsed in a food processor works best for me, but you could do this the old fashioned way too - zip lock bag and rolling pin)
2 Tbsp sugar
Custard: 2 (8-ounce) blocks cream cheese, at room temperature (VERY Important that the cheese is at room temperature, otherwise you'll get serious lumpy cheesecake!)
1 cup sugar
3 eggs
1 teaspoon vanilla extract
1 lemon, zest finely grated (optional)
1 pint sour cream
Start by spraying a 9'' spring form pan, dust with sugar set aside and prepare your crust. Preheat your oven to 325 degrees. In a medium sized mixing bowl mix butter, sugar and cracker crumbs until all crumbs are moist. Press crumb mixture into prepared pan all across the bottom and about an inch to two inches up the sides. Using fingers or a measuring cup with straight sides and large bottom surface pack the crumbs together, try to keep the crust even across the bottom and sides. Once your crust is all pressed, cover the spring form pan with a clean kitchen towel and place it in the refrigerator while you prepare the custard.
 In a large mixing bowl place room temperature cream cheese in mixing bowl. (If your cream cheese is not up to room temp, microwave it for 10 to 15 seconds to soften it up.) Use a hand mixer and beat the cream cheese for 30 seconds to a minutes until it's broken up and smooth. Add 1 cup of sugar and mix it for about 30 seconds until it's just incorporated with the cheese. Add eggs one at a time, beating for 10 to 15 seconds between eggs, keeping in mind not to over beat! Once the eggs are all added in, measure in sour cream, lemon zest, and vanilla. Mix for 30 seconds to a minute, just until streaks of sour cream are gone. Now grab your prepared crust from the fridge and using a spatula spread your custard into the pan.
 Bake the cheesecake in preheated oven for 50 - 55 minutes. The middle of your cheesecake custard will still be a bit wobbley, and might look underdone. Don't worry it will finish setting up in the refrigerator. Remove the cheesecake from the oven (do not to a toothpick test) place hot pan on a cooling rack for thirty minutes to an hour to allow cake to cool. Loosely cover cake with a clean cloth dish towel and place in refrigerator for at least 4 hours, but more preferably over night. When you're ready to serve the cake run a sharp knife between the edge of your crust and spring form pan. Now take a deep breath and un pop the latch of the spring form pan and gently remove the outside and bottom layer of your pan. (That part always makes me nervous!) Top your cake with fruit topping, fresh fruit or even melted chocolate! Enjoy, you cheesecake lovers!


Wednesday, February 16, 2011
Double Chocolate Torte
Let me start off with a couple of disclaimers, first DO NOT let the amount of ingredients/directions scare you off from trying this recipe, it looks complex and difficult when really it's neither of those things. Second if you make this delicious dessert you will not be able to quit eating it (don't say I didn't warn you). And third this will make you the star of the show, people will love you and will think you are a culinary master, and maybe people will put you in charge of bringing dessert from here on out. As long as you understand these important details we can proceed. This dessert is 100% amazing, delicious, impressive. Possibly one of the best desserts I've made. It's incredibly rich and decadent. The intense chocolaty flavor is brightened by the tart, sweet raspberries. The torte itself is made up of three parts, a dense chocolaty cake/brownie-like base, a light airy chocolate mousse and a whipped cream and raspberry topping. All layers come together to make this one delicious concoction. While the torte is time consuming it's really not difficult to make, just follow the instructions and you won't go wrong. This dessert is a fair amount of work but when you've got something special coming up, or just want to have something to do on a Saturday afternoon it's the perfect (and most delicious) thing to do.
 For the Cake:
Cake directions:
Finally cut yourself a big piece and enjoy!

Double Chocolate Torte
Ingredients:
4oz Bittersweet chocolate
4oz Semisweet chocolate
1 cup butter
1 cup sugar
5 large eggs
1 tablespoon vanilla
1/4 teaspoon salt
1/4 cup all purpose flour
For the Mousse:
1/2 cup butter cut into pieces
4 large eggs, separated
1/4 cup whipping cream
1 tablespoon vanilla
4oz bittersweet chocolate (not unsweetened) chopped
4oz semisweet chocolate, chopped finely (it is important the chocolate for this mousse layer is chopped finely or it won’t melt completely when added to the warm egg yolks)
1/2 cup sugar
For the topping:
3/4 cup whipping cream
3 tablespoons powdered sugar
1 pint fresh raspberries
Start by buttering and sugaring a 9'' spring form pan, set aside and preheat the oven to 325. In a sauce pan melt chocolate over low heat with 1 cup of butter stirring continuously. When the butter and chocolate are melted set aside and allow to cool to lukewarm. When cooled add eggs one at a time, mixing after each addition. Last add the vanilla, salt and flour stirring until no streaks remain.
Pour the batter into prepared pan, and bake at 325 for 30 to 35 minutes, or until the center of the cake puffs up slightly. Do not do the poke test, the cake will be a bit wobbly still but will set up as it cools.
Cool cake completely and refrigerate while preparing the mousse layer.
Mousse Directions:
Start by separating eggs, yolks go into one bowl and whites go into another. Whisk together egg yolks, cream, and vanilla, set aside. Over a pot of simmering water, melt butter in a glass or metal bowl. When butter is completely melted add the egg yolk/cream mixture and begin whisking immediately. Whisk continuously until the mixture is thickened and reaches 150 degrees on a thermometer, it takes about 6 minutes. When the mixture is thickened remove from heat and quickly whisk in the chopped chocolate till thoroughly incorporated, set aside.
In a separate medium sized mixing bowl whip egg whites, 1/2 cup of sugar and a pinch of cornstarch
until stiff peaks form. (You can measure the stiffness of the peaks by turning the beaters off and turning them upside down the peaks created by the whites should stand straight up)
Gently fold the chocolate mixture to the egg white mixture, being careful to not deflate the egg whites when mixing. The finished product will be light and airy. Pour the mousse over the top of the cooled cake in the spring form pan. Cover the pan and refrigerate at least 8 hours, although overnight is best.
After the mousse has set up remove the spring form pan and place on a serving dish.
Whipped cream Directions:
To finish whip whipping cream and powdered sugar with beaters until medium to stiff peaks form (or until it looks like whipped cream :)). Using a spatula spread the fresh whipped cream over the top of the mousse and sprinkle the top with raspberries.
Sunday, January 2, 2011
Fudgy Brownies

No joke best brownie recipe ever. ever. They're suppper rich, and super perfect. Crispy top layer, crunchy edges, soft, fudgy, gooey middle. You'll never make a box brownie again after you try these bad boys.
Fudgy Brownies
Ingredients:
2 sticks butter
8 oz good quality semisweet chocolate
2 c. sugar
1 tsp. vanilla
5 lg. eggs
1/3 c. unsweetened Dutch cocoa powder
1/2 tsp salt
2/3 c. flour
Preheat oven to 350 degrees. Prepare a 9x13 metal baking pan by lining it with foil and spraying with nonstick cooking spray. Melt butter and chocolate over low heat; stirring till smooth. Add one cup of sugar to hot chocolate mixture. Remove from heat and cool till lukewarm. Whisk in remaining one cup of sugar and vanilla. Whisk in eggs one at a time. Stir in salt and cocoa powder. Last add flour until it disappears (don't over mix) spread dough into the prepared pan and bake 25-35 min, or until a toothpick comes out clean (for me this was at about 28minutes - just fyi) cool the brownies to room temperature and remove from pan by holding foil edges. Cut and enjoy!
Subscribe to:
Posts (Atom)